How to Make a Gift Bow with Thin Ribbon: Easy Step-by-Step Guide
🌟 Key Takeaways
- Correct ribbon length ensures fuller bows.
- Secure centers prevent slipping bows.
- Fluff and trim for a polished finish.
- Prevent fraying with proper cutting.
- Balanced loops create professional results.
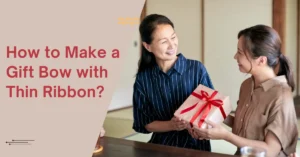
Did you know that 80% of people notice the wrapping before the gift itself? A simple, perfectly tied bow can make even a modest present feel luxurious.
Learning how to make a gift bow with thin ribbon ensures your packages always stand out.
With the right ribbon-tying tips, you can turn a delicate, thin ribbon into a stunning, professional-looking bow that elevates any gift instantly.
Create a gift bow with thin ribbon by wrapping the ribbon around your fingers 5-7 times, then sliding it off and tying the center tightly.
Fluff the loops evenly, trim the ends at an angle, and secure the bow to the gift with tape or string for a neat finish.
In this guide, we’ll also cover the tools you need, common mistakes to avoid, and creative ways to use your bows beyond gift wrapping, including hair accessories, wreaths, and décor.
By the end, you’ll master how to make a gift bow with thin ribbon with confidence and style, impressing anyone who receives your beautifully wrapped presents.
Henceforth, let’s get started!
What You’ll Need to Make a Gift Bow with Thin Ribbon
Here’s a carefully curated list of everything you need to set yourself up for success.
Selecting the right kind affects both appearance and ease of handling.
1. Satin Ribbon: Smooth and glossy, perfect for elegant bows that reflect light beautifully, ideal for weddings, anniversaries, and luxury gifts.
2. Grosgrain Ribbon: Textured with ribbed lines, holds loops well, and makes shaping symmetrical bows easier.
3. Wired Ribbon: Retains structure and crisp loops, especially useful for layered or larger bows.
4. Sheer Ribbon: Lightweight and translucent, offers delicate, airy bows for a soft, elegant finish.
5. Scissors
6. Double-Sided Tape or Glue Dots
Step‑by‑Step Guide: How to Make a Gift Bow with Thin Ribbon
These ribbon‑tying techniques will help you avoid common mistakes like uneven loops, loose centers, or frayed tails.
Step 1: Cut the Ribbon to the Right Length
For a standard medium‑size bow, begin with about 2 – 3 times the width of your finished bow in ribbon length.
Thin ribbon requires slightly more length than you think because it takes extra loops to look full.
Leave Extra for Tails. After you form your loops, you’ll want enough ribbon left for tails that hang nicely.
As a rule of thumb, reserve about 4 – 6 inches (~10 – 15 cm) on each end after shaping the loops.
Use sharp craft scissors for a clean edge; uneven cuts can make fine ribbons fray or look messy.
Plan for a diagonal or V-shaped cut later to finish neatly.
Step 2: Form the Bow Loops
Fold your ribbon into a loop on one side, then mirror that loop on the other side. Keep each loop about the same width for balance and symmetry.
Pinch the ribbon where the loops meet to establish the bow’s center.
This pinch point becomes your anchor as you build additional loops if you want a fuller look.
Step 3: Pinch & Tie the Center
Once you’ve formed the loops you want, pinch the middle area tightly.
Use the remaining ribbon or a thin piece of floral wire to tie around the pinched center, think of it like tying a knot in shoelaces.
Wrap it several times for a firm hold.
Thin ribbon can loosen if not secured well, so don’t hesitate to pull the knot snug.
Step 4: Adjust, Fluff & Trim Tails
Gently pull and spread out each loop so the bow looks full and balanced. Adjust with your fingers until the loops sit symmetrically on both sides.
Use sharp scissors to cut the tails at an angle or in a V‑shaped notch.
After trimming, take a moment to tweak any loop that looks uneven.
Tips & Tricks for Working with Thin Ribbon
Below are practical, expert‑tested tips to help you craft flawless bows with confidence.
1. Prevent Fraying Before It Happens
One of the most common issues with thin ribbon is fraying that occurs after it is cut.
Loose threads at the ends can make bows look messy or worn.
Cutting your ribbon ends diagonally or into a neat “V” helps reduce loose fibers.
For polyester or nylon ribbon, carefully pass the cut end near a flame or heat tool so fibers melt and fuse.
Applying a thin coating to the cut edges creates a protective seal that helps keep threads intact as you work.
2. Keep Your Ribbon From Twisting as You Work
Thin ribbon tends to twist more than sturdier ribbon, especially as you fold and loop it.
Avoid pulling too tightly as you loop; a light, even touch helps the ribbon lie flat.
Hold the ribbon near the center of the loop while forming the next one.
Before securing the center, spread each loop out and visually check that all loops sit flush.
3. Smooth Out Uneven Loops Like a Pro
Before tying the center, visually compare both sides as you form the loops. Small tweaks here save a lot of fixing later.
After tying, gently pull and separate each loop to create volume and balance.
If very smooth ribbons slip out of shape, place a small piece of double‑sided tape or a glue dot under the bow’s center to keep it secure.
4. Store and Prepare Ribbon Carefully
Keeping ribbons flat or loosely rolled prevents creases and bends that later cause twisting.
Ribbons stored in humid areas may weaken or fray more easily than those kept dry and clean.
Common Mistakes & How to Fix Them
Below are the bow troubleshooting scenarios and simple, expert‑approved solutions so your final result always looks polished and intentional.
1. Uneven or Lopsided Loops
Bow loops that are different sizes make the bow look unbalanced and sloppy, often because the ribbon wasn’t pulled evenly when forming loops.
Fix It
- Gently tug on each loop before tying the center to match sizes.
- Measure your loops against each other as you work
- If one loop still looks off after tying, lightly adjust it with your fingers.
2. Loose or Slipping Knots
A bow that won’t stay together often means the center knot isn’t tight enough or the ribbon’s surface is too smooth.
Fix It
- Tie an extra loop when securing the center, similar to double‑knotting shoelaces.
- Use a tiny dab of hot glue, a twist tie, or floral wire to anchor the center.
- For very fine ribbons, double‑sided tape behind the bow center.
3. Flat or Collapsed Bows
When bows are not properly fluffed or when the loops are compressed, the finished bow can look flat and lifeless.
Fix It
- After tying the center, separate and lift each loop individually.
- Use your fingertips to gently push loops outward.
- For storage or ahead‑of‑time prep, lightly steam the bow and re‑fluff.
4. Fraying Edges & Ribbon Unraveling
Thin ribbon cut edges are prone to fraying, especially with synthetic materials like satin or nylon.
Fix It
- Use very sharp scissors.
- Consider sealing cut ends with clear nail polish or a fabric fray‑stop product.
- Avoid folding or bending cut edges harshly.
5. Wrong Scale or Ribbon Choice
A bow can look awkward if the ribbon type or size doesn’t match the gift or project.
Fix It
- For delicate, smaller packages, choose finer ribbons; for larger gifts, add more loops or select a wider ribbon.
- Avoid extremely flimsy ribbon for bows that need structure; wired or medium‑weight ribbon holds shape better.
FAQs
1. How do I make a gift bow with thin ribbon look fuller?
To create a fuller bow, wrap the ribbon around your fingers 5 – 7 times for multiple loops before tying the center. After securing, fluff each loop individually and adjust symmetry. Using slightly wired ribbon also helps the bow maintain shape.
2. How long should I cut my ribbon for a small gift bow?
Measure about 2 – 3 times the width of your finished bow for loops, plus an extra 4 – 6 inches (10 – 15 cm) on each tail. Thin ribbons may require a bit more length to create full-looking loops without appearing sparse.
3. How can I prevent thin ribbon from fraying?
Fraying can be avoided by
- Cutting the ribbon at a diagonal or V-shape.
- Sealing synthetic ribbons with a light touch of heat, nail polish, or fabric glue.
- Use sharp scissors dedicated to ribbons.
4. What do I do if my bow loops are uneven?
Before tying the center, adjust each loop to match in size. After tying, gently fluff and reshape loops. Using a small guide (like a marker or ruler) can help maintain consistent loop width.
5. Can I use thin ribbon bows for purposes other than gift wrapping?
Absolutely! Thin ribbon bows are versatile:
- Hair accessories, clips, and headbands
- Wreaths, garlands, and holiday décor
- Cards, scrapbooks, and party favor decorations
6. How do I secure a slippery satin ribbon bow?
For satin or smooth ribbons, tie the center tightly and consider using a small piece of double-sided tape, a glue dot, or floral wire underneath the knot to keep loops in place without damaging the ribbon.
Conclusion
A beautifully crafted gift bow with thin ribbon can transform any present from ordinary to unforgettable.
By carefully selecting your ribbon, measuring and cutting precisely, forming balanced loops, and securing the center tightly, you can create bows that look professional and elegant every time.
Beyond gift wrapping, these delicate bows add charm to home décor, party decorations, hair accessories, and handmade cards.
With these expert ribbon-tying tips, your bows will not only enhance the presentation of your gifts.
Gift Me What – Where Every Gift Finds Its Perfect Match!