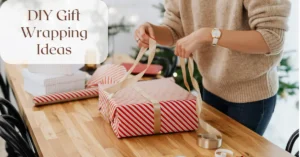
In a world where thoughtful details matter more than price tags, how a gift is wrapped often leaves a stronger impression than the gift itself.
That’s one reason searches for DIY gift wrapping ideas have grown rapidly.
DIY gift wrapping ideas include using brown kraft paper, fabric wraps, recycled newspaper, or even reusable tote bags.
Then, elevate them with twine, dried flowers, hand-drawn tags, stamps, or simple bows.
These approaches reduce waste, cost less than store-bought wrap, and create a personalized, handmade look that feels intentional rather than generic.
At their core, DIY gift wrapping ideas focus on creative gift wrapping and homemade gift wrap techniques that transform everyday materials into something special.
It works just as well for birthdays, holidays, kids’ gifts, and special events as it does for last-minute surprises.
In this guide, you’ll learn about essential supplies, the best materials to use, step-by-step wrapping techniques, beginner-friendly ideas, eco-conscious options, and expert tips to make every gift look thoughtfully wrapped.
Hence, let’s dive into it!
Basic Supplies for DIY Gift Wrapping Ideas
To make things easy, these supplies are divided into must-have essentials and optional decorative touches you can add as you gain confidence.
Must-Have Essentials for DIY Gift Wrapping
These foundational materials form the base of most DIY gift wrapping styles:
- Brown kraft paper
- Twine or string
- Scissors
- Tape
- Glue
Optional Decorative Items to Elevate Your Wrap
These optional items help add personality and creativity without making things complicated:
- Dried flowers or greenery for a natural, elegant finish
- Fabric scraps to introduce color, softness, or texture
- Stamps for easy, repeatable patterns and designs
- Stickers for quick personalization, especially for children’s gifts
Best Materials for DIY Gift Wrapping
Choosing the right material upfront improves folding, decoration, and overall presentation.
Paper-Based DIY Gift Wrapping Materials
Paper-based materials are the most practical wrapping paper alternatives. They are affordable, widely available, and easy to decorate with minimal effort.
- Kraft paper
- Newspaper
- Old maps
- Sheet music
- Grocery paper bags
- Kids’ artwork
Fabric & Reusable Wrapping Options
Fabric wrapping is a reusable gift wrap solution. It reduces waste, adds texture, and eliminates the need for tape.
- Fabric gift wrapping: Cotton cloth, fabric remnants, or soft textiles work well for irregular shapes.
- Scarves and bandanas: Scarves function as both a wrap and a gift. They add value while reducing packaging waste.
- Furoshiki (Japanese fabric wrapping): Furoshiki is a traditional Japanese wrapping method. It uses square fabric and folding techniques to create secure, elegant wraps without adhesives.
Creative DIY Gift Wrapping Techniques (Step-by-Step)
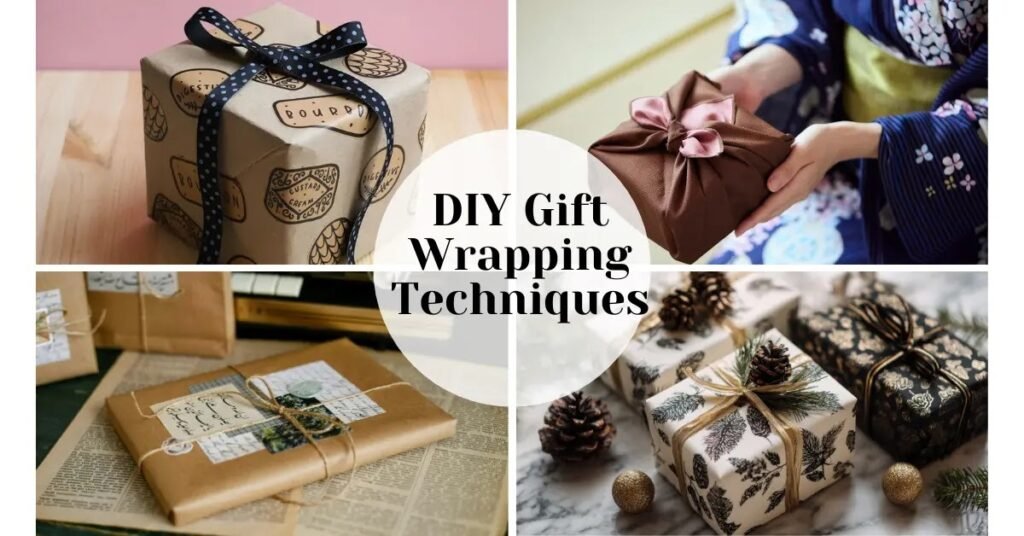
These methods are practical for beginners and experts alike.
1. Painted & Hand-Decorated Gift Wrap
Hand-painted wrapping paper adds uniqueness, enhances visual appeal, and makes gifts feel personal.
Step 1: Choose your paper
Select kraft paper, recycled paper, or plain white sheets. Strong, smooth paper absorbs paint well and supports embellishments.
Step 2: Apply painting techniques
Use brush strokes, spray bottles, stamping, or bubble wrap printing. Each method creates distinct textures and patterns.
Step 3: Let the paint dry completely
Drying prevents smudges and ensures a clean finish.
Step 4: Add simple accents
Attach twine, dried flowers, or hand-drawn tags. These finishes emphasize the handmade effect.
2. Folding, Pleating & Pro Wrapping Styles
Pleated and layered folds create professional, luxurious-looking gifts. They improve paper handling and highlight attention to detail.
Step 1: Measure and cut precisely
Cut paper with 2 – 3 inches of excess for clean edges and sharp folds.
Step 2: Create pleats or layers
Fold edges inward or layer contrasting papers. Layering adds depth and visual interest.
Step 3: Secure folds neatly
Use minimal tape to hold layers in place without bulk.
Step 4: Add finishing touches
Attach a ribbon, dried flower, or decorative tag for elegance.
3. DIY Bows, Ribbons & Closures
Handmade bows and creative closures complete the presentation. They add charm, secure wrapping, and complement the gift’s style.
Step 1: Select ribbon or twine
Choose cotton twine, satin ribbon, or fabric strips. Each material affects style, texture, and how easily you can tie ribbon like a pro.
Step 2: Make a simple bow
Cut ribbon 2 – 3 times the box length. Form loops, cross, and pull through to knot. Adjust loops for symmetry to achieve a professional look.
Step 3: Try alternative closures
Wrap twine multiple times, tie fabric strips, or add small ornaments.
Step 4: Secure and tidy
Tuck ends under folds or lightly tape to maintain a neat appearance.
Expert Tips
Combine techniques for maximum effect: paint the paper, fold neatly, and finish with a handmade bow.
Consistent color palettes and proportionate embellishments make gifts look polished.
Natural elements like dried flowers or leaves add texture and an eco-friendly touch.
Easy DIY Gift Wrapping Ideas by Occasion
Below are actionable instructions for Christmas, birthdays, and all-year gifting.
DIY Gift Wrapping Ideas for Christmas
Christmas gift wrapping focuses on festive colors, natural textures, and seasonal details.
Step 1: Choose a base paper
Select kraft paper, recycled paper, or plain white sheets. These surfaces are sturdy and absorb paint or stamps well.
Step 2: Add seasonal colors
Paint or layer red, green, gold, or silver accents. Use markers, stamps, or ribbon to create holiday patterns.
Step 3: Incorporate natural elements
Attach twine, pine sprigs, cinnamon sticks, or dried berries for a rustic, handmade look.
Step 4: Add ornaments or finishing touches
Tie small ornaments, bells, or handmade tags to the ribbon or twine. This completes the festive aesthetic.
DIY Gift Wrapping Ideas for Birthdays
Birthday wrapping emphasizes bright colors, playful designs, and personalized details.
Step 1: Pick a vibrant base
Use colored kraft paper, patterned sheets, or plain paper decorated with doodles or stickers.
Step 2: Add fun textures and layers
Layer papers, add ribbons, or fold edges for dimension. Layered colors create a festive effect.
Step 3: Personalize with tags or messages
Attach handwritten notes, mini drawings, or name tags for a meaningful touch.
Step 4: Create playful bows or accents
Make simple bows or add small objects like confetti, mini balloons, or stickers to enhance the fun look.
DIY Gift Wrapping for Holidays (Other Than Christmas)
Holiday-specific wraps add theme-appropriate charm quickly.
Step 1: Choose colors for the holiday
- Valentine’s Day: red, pink, hearts
- Mother’s Day: pastels, florals
Step 2: Decorate with symbols or textures
Add small items like heart-shaped tags, lace, flowers, or stickers relevant to the holiday.
Step 3: Add ribbons or twine
Tie neatly using color-coordinated ribbons for a cohesive look.
Step 4: Finalize with accents
Add small ornaments, dried flowers, or handmade tags to complete the theme.
DIY Gift Wrapping for Weddings & Special Events
Elegant occasions require neutral tones, clean folds, and minimalistic finishing.
Step 1: Select a soft, neutral base
Use white, cream, or pastel papers, or reusable Furoshiki fabric wraps.
Step 2: Fold and layer neatly
Ensure crisp edges and smooth folds. Layer multiple papers if desired for depth.
Step 3: Tie bows or fabric strips
Use satin ribbons, twine, or simple knots for elegance.
Step 4: Add understated accents
Attach dried flowers, small charms, or handmade tags. Keep decorations minimal to maintain sophistication.
DIY Gift Wrapping Ideas Using Fabric
Using scarves, bandanas, or Furoshiki techniques allows gifts to be wrapped without tape while remaining secure and stylish.
Step 1: Choose the right fabric
Select a square or rectangular cloth such as a scarf, bandana, or cotton fabric. The material should be soft, flexible, and large enough to fully cover the gift.
Step 2: Place the gift at the center
Lay the fabric flat and position the gift box in the middle. Ensure equal overhang on all sides for even folding.
Step 3: Fold the corners over the gift
Bring two opposite corners together first, securing them with a tight knot. Then fold the remaining corners on top. This creates a neat, no-tape closure.
Step 4: Tie a decorative knot
Finish with a Furoshiki-style knot at the top. Adjust loops and tails for symmetry. Optionally, add small accessories like dried flowers or charms for a polished look.
Step 5: Explore alternative folds
Try bandana wraps or rectangular fabric wraps for tall or irregularly shaped gifts. These techniques secure the gift without adhesives while remaining reusable.
DIY Gift Wrapping Ideas for Kids’ Gifts
Adding personal touches like stickers, drawings, and playful folds keeps wrapping engaging and memorable.
Step 1: Pick bright, playful paper
Use colored kraft paper, patterned sheets, or plain paper decorated with markers. Bright colors immediately attract attention.
Step 2: Add interactive elements
Incorporate stickers, small drawings, or stencils on the wrapping paper. Children enjoy gifts that feel participatory or are themed around their interests.
Step 3: Include fun textures
Layer ribbons, twine, or fabric scraps over the surface. Use pom-poms, confetti, or small toys to make the wrapping interactive and exciting.
Step 4: Personalize the gift tag
Write the child’s name or a short message using hand-drawn designs or colorful markers.
Step 5: Secure and present
Fold edges neatly, secure with minimal tape, and ensure all decorative elements are safely attached.
DIY Gift Wrapping Ideas Without a Box
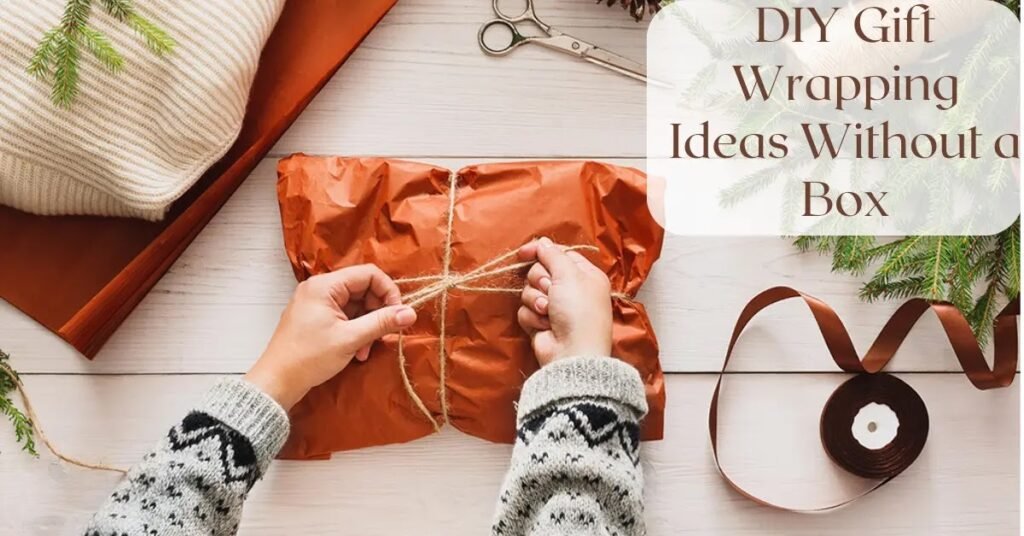
With a few creative techniques, you can achieve a professional, handmade look even without a standard gift box.
Method 1: Fabric or Furoshiki Wrapping
Fabric wrapping is versatile, reusable, and elegant, perfect for gifts like clothes, books, or bottles.
1. Choose your fabric. Use a square scarf, a tea towel, or a Furoshiki cloth.
2. Place the gift in the center of the fabric.
3. Fold edges. Bring opposite corners together and tie a secure knot.
4. Tie the remaining corners. Cross the other two corners on top and make a second knot or bow.
5. Optional decoration. Add a dried flower, small ornament, or ribbon on top for a polished finish.
Method 2: Paper Wrapping Without a Box
Paper wrapping works well for soft or irregular gifts and can be personalized with stamps, drawings, or printed patterns.
1. Select sturdy wrapping paper. Kraft paper, newspaper, or sheet music works best.
2. Lay the gift in the center. Fold the paper around it, creating a “pouch” shape.
3. Gather and twist edges. Bring the ends together and twist like a candy wrapper.
4. Secure with twine or ribbon. Tie the twisted ends firmly to keep the gift intact.
5. Add embellishments. Stickers, tags, or dried flowers can enhance the presentation.
Method 3: Reusable Pouches or Tote Bags
1. Using cloth pouches or small tote bags is eco-friendly and perfect for odd-shaped gifts.
2. Select a reusable pouch or bag. Choose a size that snugly fits the gift.
3. Place the gift inside. Make sure it sits flat or upright, depending on its shape.
4. Fold or cinch the top. Use a drawstring, ribbon, or twine to close the bag securely.
5. Decorate as needed. Add tags, fabric flowers, or small charms for a custom touch.
Method 4: Creative Wrapping with Household Items
Household items can become unique, zero-waste wrappers for small or lightweight gifts.
1. Use items like jars, baskets, or kitchen towels. These double as wrapping and gift containers.
2. Place the gift inside securely. Use tissue paper or cloth for padding.
3. Wrap or cover creatively. Fold towels around the gift or cover jars with fabric.
4. Secure with twine or ribbon. Add small ornaments or handwritten tags for a personal touch.
Tips for Wrapping Without a Box
- Choose flexible materials
- Secure tight closures
- Add texture and layers
- Keep it personalized
Cheap & Budget-Friendly DIY Gift Wrapping Ideas
You can repurpose household items and inexpensive materials to achieve polished results without breaking the bank.
Step 1: Reuse Newspaper and Magazine Pages
Newspapers and magazines are versatile, low-cost gift-wrapping bases. They wrap gifts securely and can be decorated easily.
To use them, flatten the pages and cut them to size, then fold the edges neatly around the gift.
Add a colorful ribbon, string, or twine for a polished look.
You can also stamp or doodle patterns for a personal touch.
Step 2: Repurpose Old Maps and Scrap Paper
Old maps, sheet music, or discarded paper add a unique touch and create creative, conversation-starting gift wraps at no cost.
Choose papers with interesting textures or patterns and wrap the gift box as you would with standard paper.
Enhance the look with twine, small tags, or simple bows.
Step 3: Use Scrap Fabric or Clothing
Scrap fabric offers a reusable and stylish way to wrap gifts.
To use it, cut a square of fabric slightly larger than the gift.
Wrap the gift using Furoshiki-style knots or simple folds, and add small accents like buttons, charms, or dried flowers.
Tuck the edges neatly to secure the wrapping without any adhesives.
Step 4: Upcycle Grocery Bags and Boxes
Grocery bags and cardboard boxes make sturdy, eco-friendly gift wraps, ideal for oddly shaped items or heavier gifts.
Flatten the bags or cut them to size, then wrap like traditional paper and secure with twine or ribbon.
Decorate with markers, stamps, or simple cut-outs, and consider layering with other upcycled materials for a creative, budget-friendly presentation.
Step 5: Add Simple Decorative Accents
Minimal embellishments can enhance budget-friendly gift wraps. They keep costs low while making gifts look polished and thoughtful.
You can tie a twine bow or fabric strip, attach handmade tags, small ornaments, or dried flowers, and focus on balance and symmetry to elevate simple materials.
Tips to Make DIY Gift Wrapping Ideas Look Professional
Follow these steps to ensure your gifts look intentional and refined.
Step 1: Stick to a Consistent Color Palette
Consistent colors are essential for creating visual harmony and a sophisticated look, as clashing tones can make even the most creative wrapping appear messy.
It’s best to limit your palette to two or three complementary colors across paper, ribbons, and accents.
Using neutral bases, like kraft paper, white, or beige, helps highlight pops of color.
Repeating colors in ribbons, tags, or small decorations adds a cohesive touch to the overall styling.
Step 2: Create Symmetry and Balance
Symmetry makes gift wrapping look intentional and professional.
Balanced placement of bows, ribbons, and tags enhances visual appeal.
Center bows, twine, or decorative accents on the gift, fold edges evenly on all sides, and align tags or ornaments so they are parallel or centered.
Adjust the placement slightly if needed to achieve overall visual harmony.
Step 3: Master Clean Folds and Sharp Edges
Symmetry makes gift wrapping look intentional and professional.
Balanced placement of bows, ribbons, and tags enhances visual appeal.
Center bows, twine, or decorative accents on the gift, fold edges evenly on all sides, and align tags or ornaments so they are parallel or centered.
Adjust the placement slightly if needed to achieve overall visual harmony.
Step 4: Keep Decorations Minimal and Purposeful
Minimal embellishments are key to achieving an elegant finish, as too many accents can look cluttered and cheapen the presentation.
Limit decorations to one or two highlights, such as a dried flower or handmade tag.
Choose natural or reusable materials for a sophisticated look, and keep spacing consistent while ensuring decorations are proportional to the gift size.
Step 5: Layer Materials Thoughtfully
Layering adds depth, texture, and a sense of value without increasing cost.
You can combine different materials like paper, fabric, or recycled elements.
Placing decorative accents on top helps draw attention to focal points. Make sure to align each layer carefully for a neat and intentional look.
FAQs
1. What are the easiest DIY gift wrapping ideas?
The easiest DIY gift wrapping ideas use minimal materials, simple folds, and basic decorations. Examples include brown kraft paper with twine, paper bag wraps, or newspaper with a ribbon bow.
2. What materials are best for DIY gift wrapping?
Brown kraft paper or newspaper provides a sturdy, low-cost base. Fabric wraps or scarves offer reusable and eco-friendly options. Twine, ribbons, and recycled decorative elements add the perfect finishing touches.
3. How can I wrap gifts without wrapping paper?
Fabric squares or scarves can be used with Furoshiki techniques, while paper bags, grocery bags, or old maps make sturdy and creative bases. Newspaper, sheet music, or kids’ artwork provide unique, eco-friendly wrapping options. Finish the look by securing the gift with twine, ribbons, or fabric strips for a polished appearance.
4. Are DIY gift wrapping ideas cheaper?
Using recycled materials, household items, or reusable fabric reduces expenses while allowing for customized, stylish results. Minimal decoration and smart material choices make DIY wrapping budget-friendly without sacrificing presentation quality.
5. What are eco-friendly DIY gift wrapping ideas?
Popular methods include using Furoshiki fabric wraps or scarves for a reusable and elegant presentation. Recyclable paper, newspaper, or old maps can serve as creative wrapping bases, while natural decorations like dried flowers, twine, or leaves replace plastic.
Conclusion
DIY gift wrapping ideas are practical, budget-friendly, and highly customizable.
They save money, reduce waste, and encourage creativity. It turns simple materials like kraft paper, fabric, or recycled items into elegant, memorable presentations.
By experimenting with folding techniques, bows, ribbons, and eco-friendly materials, you can elevate any gift to a professional-looking result while expressing care and individuality.
Whether for holidays, birthdays, or special occasions, DIY gift wrapping adds meaning and charm that store-bought wraps cannot replicate.
Embrace these techniques, mix colors, textures, and personal touches, and make every gift a unique expression of thoughtfulness and style.
Gift Me What – Where Every Gift Finds Its Perfect Match.