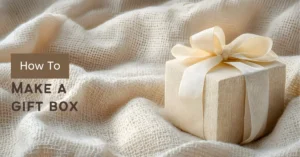
Store-bought gift boxes are often expensive, poorly sized, or wasteful – which is why so many people search for how to make a gift box themselves.
The good news? Making a beautiful DIY gift box is easier than you think.
With basic materials like craft paper, cardstock, or recycled cardboard, you can create sturdy, stylish boxes in minutes.
Make a gift box by cutting cardstock to size, scoring fold lines, and folding it into a box shape. Glue or tape the edges to secure the sides.
Add a lid by repeating the process slightly larger. Finish by decorating with ribbon, paper, or labels.
In this guide, you’ll learn step-by-step how to make a gift box at home, whether it’s a small box for jewellery, a medium box for accessories, or a large gift box for special occasions.
We’ll cover easy beginner-friendly methods, quick DIY variations like origami-style boxes or paper plate hacks, tips for sizing and decorating, and common mistakes to avoid so your gift box looks professional and polished.
Therefore, let’s get started!
Materials Needed to Make a Gift Box
Here’s a detailed guide to the essential tools and materials you’ll need.
- Paper or Cardstock
- Cardboard or Chipboard Sheets
- Scissors or Craft Knife
- Strong Adhesive or Craft Glue
- Glue or Double-Sided Tape
- Ruler
- Scoring Tool or Bone Folder
- Cutting Tools
- Decorative Finishes
Step-by-Step: How to Make a Gift Box from Paper
This step-by-step guide breaks down the process into clear, actionable steps so even beginners can achieve professional-looking results.
Step 1: Choose and Prepare the Paper
Medium to heavyweight cardstock (200 – 300 gsm) works best because it folds cleanly and holds its shape without tearing.
Decorative craft paper adds a personal touch, but make sure it’s not too thin.
A square sheet is ideal for traditional boxes, though you can also trim A4 paper into a square.
Before folding, flatten the paper completely and remove any wrinkles. If it has a pattern, align the design with the sides of your box.
For small boxes or party favors, lighter paper is fine, but heavier cardstock is better for larger or more durable boxes.
Step 2: Mark and Score Fold Lines
To score, use a ruler and a bone folder, stylus, or scoring tool to make shallow lines where the folds will go.
Measure a consistent width from each edge, usually 1 – 2 inches based on the box size, and lightly draw lines to guide your folds.
Scoring prevents thick paper from cracking and ensures the sides stay symmetrical.
Step 3: Fold and Shape the Box
Start by folding each corner to the center or along the scored lines to form the base.
Next, fold the sides up to create the vertical walls. Tuck and align the edges neatly so all corners meet for a sharp, professional look.
A helpful tip is to test-fold the paper without glue first to make sure everything lines up before final assembly.
Step 4: Secure and Finish the Box
Apply glue or double-sided tape along the vertical edges only.
For larger boxes, add small tabs or extra tape at the corners to make them more stable.
Decorate with ribbons, washi tape, labels, or small embellishments to make the box look attractive.
How to Make a Gift Box with a Lid
When making a gift box with a lid, the process is very similar to creating the base box, with a few small adjustments to ensure a snug, yet easily removable fit.
Creating a lid is simple when you follow a consistent, step-by-step approach,
1. Choose the Paper or Cardstock: Use the same material as the base box for a coordinated look.
2. Increase Size Slightly: Add about 1/8 to 1/4 inch (3 – 6 mm) to each dimension of the base box to allow the lid to fit comfortably over the box.
3. Score Fold Lines: Just like the base, lightly score the fold lines to create clean, crisp edges.
4. Fold and Shape: Repeat the folding process used for the base box.
5. Secure the Lid: Apply glue or double-sided tape sparingly to hold the edges.
How to Make a Gift Box from Cardboard
To create a durable cardboard box, you’ll need,
- Cardboard or Chipboard Sheets
- Cutting Tools
- Strong Adhesive
- Ruler and Scoring Tool
- Decorative Materials
Step 1: Measure and Cut
Use your ruler to mark precise dimensions and cut carefully with a craft knife.
Step 2: Score Fold Lines
Lightly score along the fold lines to make bending cardboard easier and prevent uneven folds.
Step 3: Fold Carefully
Fold the edges along the scored lines to form the base and sides of the box.
Step 4: Secure Edges
Apply glue or tape along the vertical edges; allow the glue to dry before adding contents.
Step 5: Decorate and Finish
Personalise with wrapping paper, ribbon, or labels for a polished, gift-ready appearance.
Easy Gift Box Variations (Quick DIY Methods)
Below are two of the most popular and beginner-friendly variations.
Method 1: Origami-Style Gift Box
The origami-style gift box is a classic, no-glue option that relies entirely on folding. It’s perfect for lightweight gifts such as jewelry, small toys, or candies.
Here is how to make it,
1. Choose Paper: A square sheet of medium-weight paper or cardstock works best.
2. Fold Precisely: Follow simple origami folds to create the base and sides.
3. Form the Box: Tuck in corners and fold edges to lock the shape.
4. Add a Lid (Optional): Use a slightly larger square and repeat the folding process for a removable lid.
Method 2: Paper Plate Gift Box Hack
For a creative twist, a paper plate can be transformed into a quick gift box.
This method is especially great for party favors, candies, or small handmade treats.
Here is how to make it,
1. Fold the Plate: Fold the edges inward to create the box sides.
2. Cut Corners: Make small cuts from the edge to the fold lines to allow the sides to form neatly.
3. Assemble: Fold up the sides and tuck the tabs inside to create a secure shape.
4. Secure (Optional): Use tape or stickers to hold the edges if needed.
How to Make a Gift Box for Different Occasions
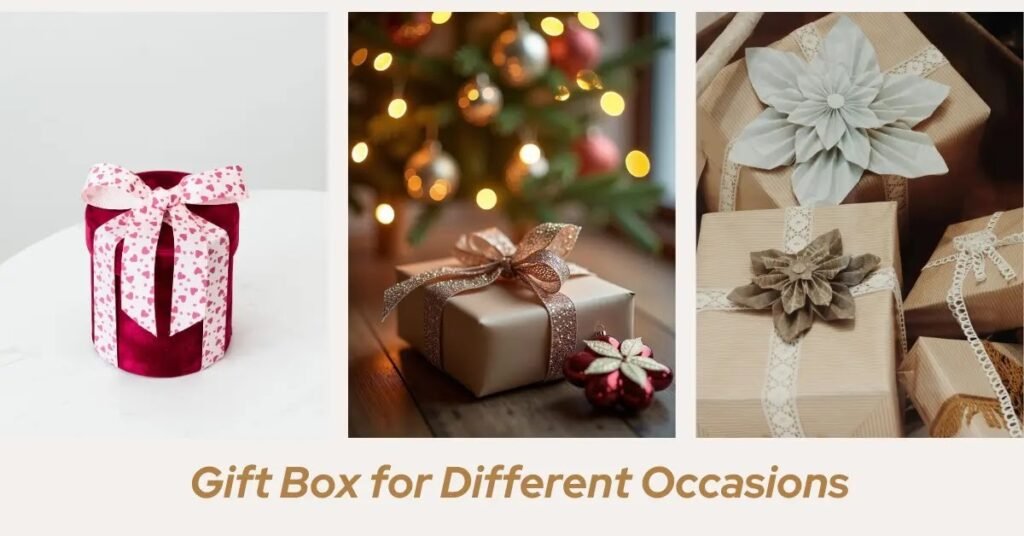
Here’s how to adapt your gift box for popular occasions.
How to Make a Birthday Gift Box
Birthday gift boxes are all about fun, vibrancy, and personalization.
- Bright Colors: Use bold and cheerful hues such as red, yellow, blue, or pink to create a festive look.
- Themes: Incorporate designs that reflect the recipient’s interests, such as balloons, animals, or favorite characters.
- Decorations: Add ribbons, glitter, or stickers to make the box lively and eye-catching.
How to Make a Wedding Gift Box
Wedding gift boxes are elegant, understated, and timeless.
- Elegant Designs: Choose soft, sophisticated colors like white, cream, pastel pinks, or gold accents.
- Minimalist Styles: Keep the design simple, think delicate ribbons, lace trims, or metallic lettering.
- Personal Touches: Monograms, calligraphy, or small floral embellishments add a refined, personal touch.
How to Make a Christmas Gift Box
Christmas gift boxes should feel festive and seasonal.
- Holiday Patterns: Use snowflakes, reindeer, Christmas trees, or candy cane prints for a festive touch.
- Seasonal Colors: Incorporate classic holiday colors like red, green, gold, and silver.
- Finishing Touches: Add ribbons, jingle bells, or small ornaments to make the box extra festive.
How to Decorate a Gift Box
Here’s a breakdown of popular, creative, and professional methods to decorate your gift box.
Ribbons
You can use different types like satin, grosgrain, velvet, or organza, each giving a unique look, from soft and romantic to bold and luxurious.
Try wrapping ribbons around the box, tying bows on top, or layering them for extra style.
For the best effect, match the ribbon color to the box or occasion, bright colors for birthdays and metallic shades for weddings or Christmas.
These ribbon-tying tips help make every gift look polished and special.
Stickers and Embellishments
Choose decorative stickers with patterns or messages that match the recipient’s interests or the occasion.
Small embellishments like flowers, charms, buttons, or sequins can make the box feel unique and handmade.
Hand Lettering and Calligraphy
Personalized messages make your gift box memorable.
Use brush pens, markers, or metallic pens to add names, short messages, or monograms.
Fabric Wrapping
Fabric adds texture, elegance, a sustainable touch, and the best practices for wrapping a gift beautifully.
Furoshiki-style wraps, soft cloths, or decorative scarves can completely cover a box and double as part of the gift.
Minimalist vs Luxury Styles
For a minimalist look, focus on clean lines, neutral colors, and subtle embellishments like a single ribbon or tag.
For a luxury vibe, layer textures, use metallic accents, rich colors, intricate bows, or combine materials for a sophisticated look.
Eco-Friendly Ways to Make a Gift Box
Creating an eco-friendly gift wrapping not only reduces waste but also adds a thoughtful, conscious touch to your gift.
Recycled Paper
You can use recycled cardstock or craft paper to create sturdy boxes for small to medium gifts.
It helps reduce the use of new paper, keeps waste out of landfills, and can be recycled again after use.
For the best results, choose recycled paper with a smooth finish so your folds stay clean and the edges look crisp and professional.
Kraft Paper
Kraft paper works well for medium-sized gift boxes or recycled cardboard wraps.
You can decorate it with twine, dried flowers, or stamps for a simple but charming presentation.
Kraft paper is 100% biodegradable, recyclable, and adds a stylish, earthy touch to any gift.
Newspaper Gift Boxes
You can fold or glue newspaper into box shapes, using extra layers to make them stronger.
Decorate by showing headlines, illustrations, or comic strips for a creative touch.
Gift Box Sizes and Use Cases
Understanding small, medium, and large gift box sizes helps you select the perfect dimensions for your gift.
| Gift Box Size | Typical Dimensions | Best Uses |
| Small Gift Boxes | 2 – 4 inches (5 – 10 cm) | Jewelry, candies, small trinkets, party favors |
| Medium Gift Boxes | 5 – 8 inches (12 – 20 cm) | Accessories like scarves, belts, watches, or small home décor items |
| Large Gift Boxes | 9 inches (23 cm) and above | Clothing, gift hampers, multiple gifts, heavier items |
Common Mistakes to Avoid When Making a Gift Box
Here are the most frequent errors and how to prevent them.
1. Using Paper That Tears Easily
Lightweight paper can tear when folded, scored, or when the gift is placed inside.
Opt for medium-weight cardstock for paper boxes or reinforced cardboard for sturdier designs.
Always test a small fold first to see how the paper behaves.
2. Wrong Sizing of the Box
A box too small may not fit the gift, while a box too large can look empty and sloppy.
Measure your gift carefully, then add 0.5 – 1 inch (1 – 2.5 cm) for clearance. Check all dimensions before cutting to ensure a perfect fit.
3. Weak Glue Points or Adhesion
Using too little glue, weak tape, or not letting the adhesive set can compromise box integrity.
Use high-quality craft glue or double-sided tape, apply evenly along edges, and hold pieces in place until fully dry.
4. Over-Decorating or Imbalanced Design
Large bows, heavy embellishments, or too many colors can make the box look messy.
Keep proportion in mind, balance colors, and choose embellishments that complement the box size and occasion.
FAQs
1. How long does it take to make a gift box?
A small paper or cardstock gift box can take 10 – 15 minutes, while a large or elaborately decorated box may take 30 – 60 minutes.
2. What paper is best for making a gift box?
Cardstock or medium-weight paper is ideal for small to medium boxes, as it folds cleanly and provides durability. For heavier or larger gifts, recycled cardboard or chipboard is recommended.
3. Can kids make gift boxes?
Yes, kids can make simple DIY gift boxes, especially origami-style or paper plate boxes. Supervision is recommended for cutting or using adhesives. Choosing bright, colorful paper and fun embellishments makes the activity both safe and enjoyable for children.
4. How do you make a gift box stronger?
To strengthen a gift box, use sturdy materials like cardboard or thick cardstock. Reinforce edges and corners with tape or extra glue, and consider adding internal supports or inserts for heavier items.
5. How to make a gift box without tools?
You can create a simple gift box without scissors, rulers, or glue by using folding techniques such as origami or upcycling items like paper plates, old boxes, or fabric wraps.
Final Insight
Creating your own DIY gift box is easier and more rewarding than it seems.
From paper and cardstock boxes to cardboard creations, origami styles, and quick paper plate hacks, there’s a method for every skill level and occasion.
Experiment with sizes, decorations, and sustainable materials to make your gift truly memorable.
Remember, the beauty of DIY is personal creativity; no two boxes need to look alike.
Whether it’s for birthdays, weddings, or holidays, crafting your own gift box adds a thoughtful, professional touch.
Gift Me What – Where Every Gift Finds Its Perfect Match.